Add a variable
A variable is created in two steps: first it is defined in the project, then it is assigned to a protocol that will feed it with data.
Define the variable
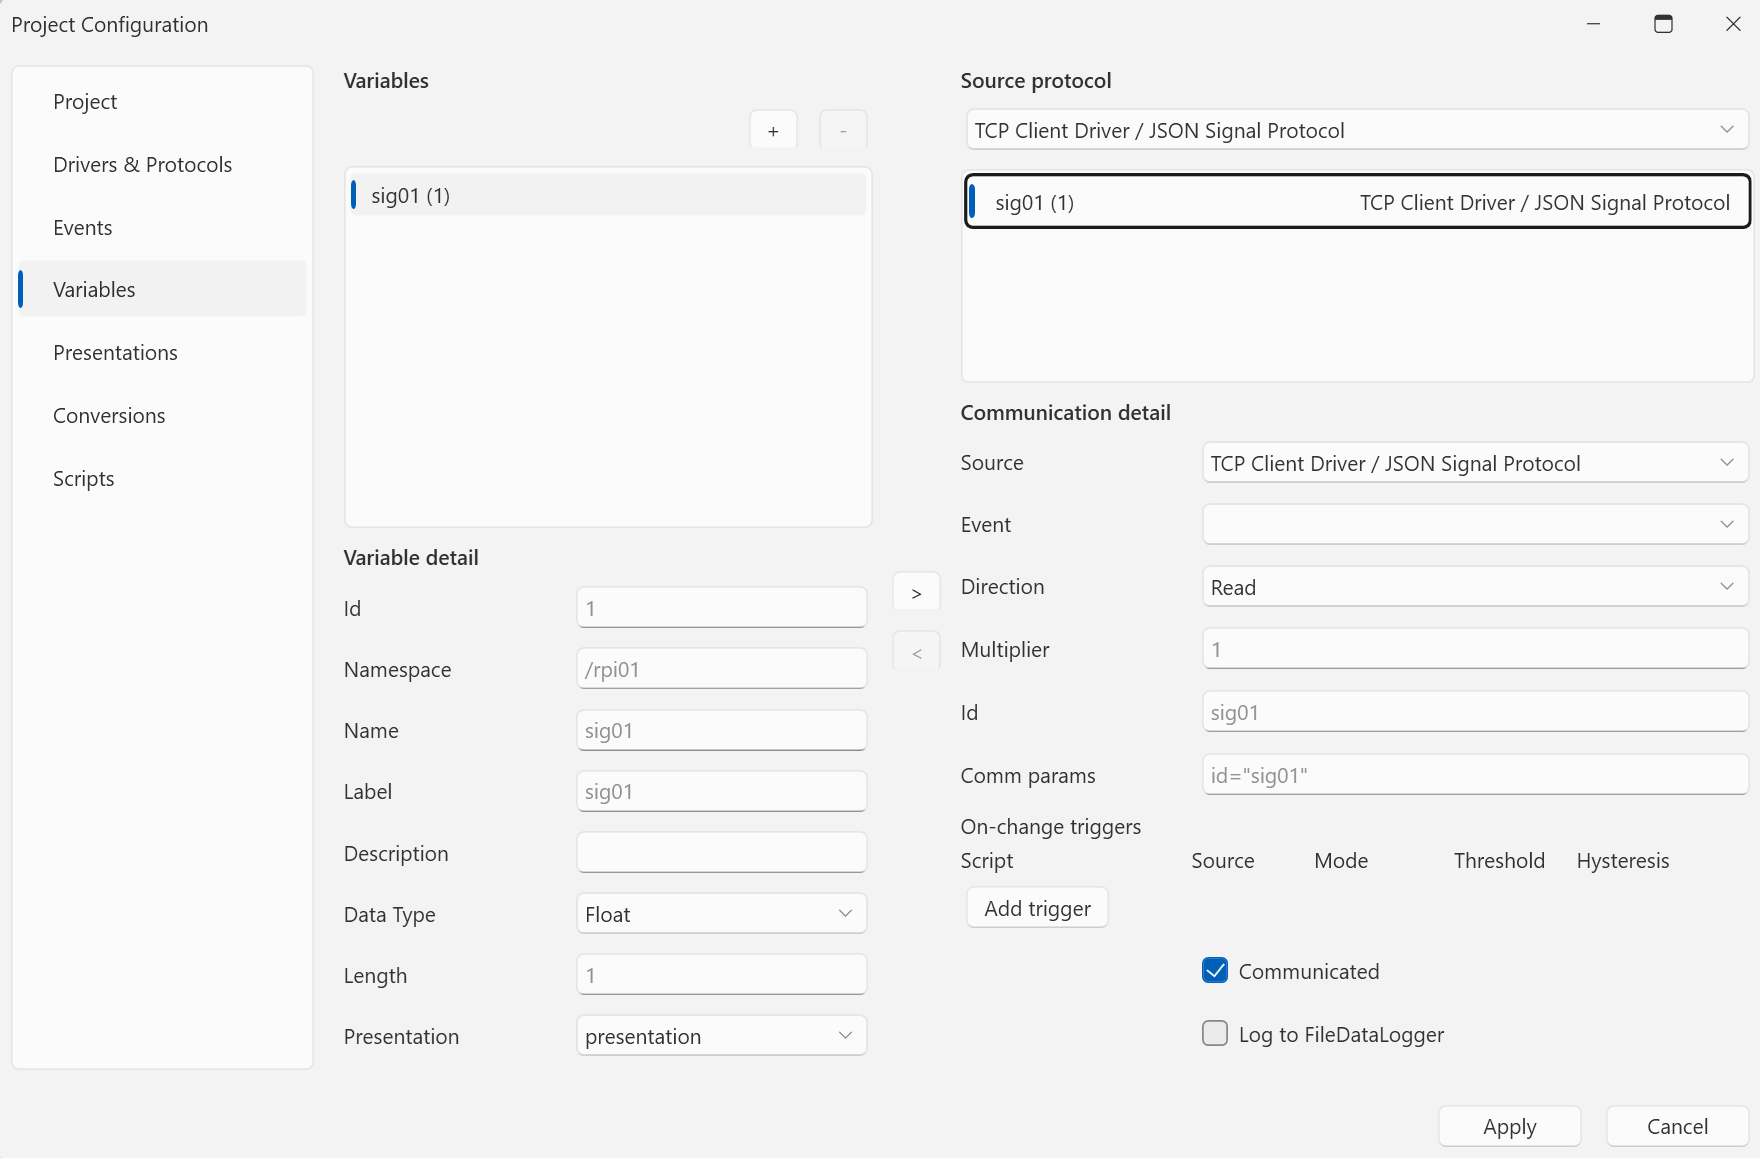
- Open Home → Project Configuration → Variables and click +.
- Fill in the properties: Name (a unique name), Label, optionally Namespace and Description.
- Choose the Data Type and the Presentation (created in the previous chapter). Leave Length at 1 unless the value is an array.
- Confirm with Apply — the value size is derived automatically from the data type.
Assign it to a protocol
- In the same section, pick the Source on the right — the driver + protocol pair that should feed the variable.
- Move the variable with the arrow button into the Communicated variables of the selected source. (The variable must be applied first.)
- In the communication detail, set:
- Direction — the communication direction (Read, Write, ReadWrite),
- Event — the event deciding when the value is communicated (e.g. a period),
- Id — the identifier within the protocol; the default is the variable name. For the JSON Signal protocol it is the signal name; for Raw CAN you enter the CAN ID, offset, and byte order in the Comm params field instead,
- Multiplier — an optional protocol multiplier,
- Log to FileDataLogger — check it if the variable should be logged (see Logging data).
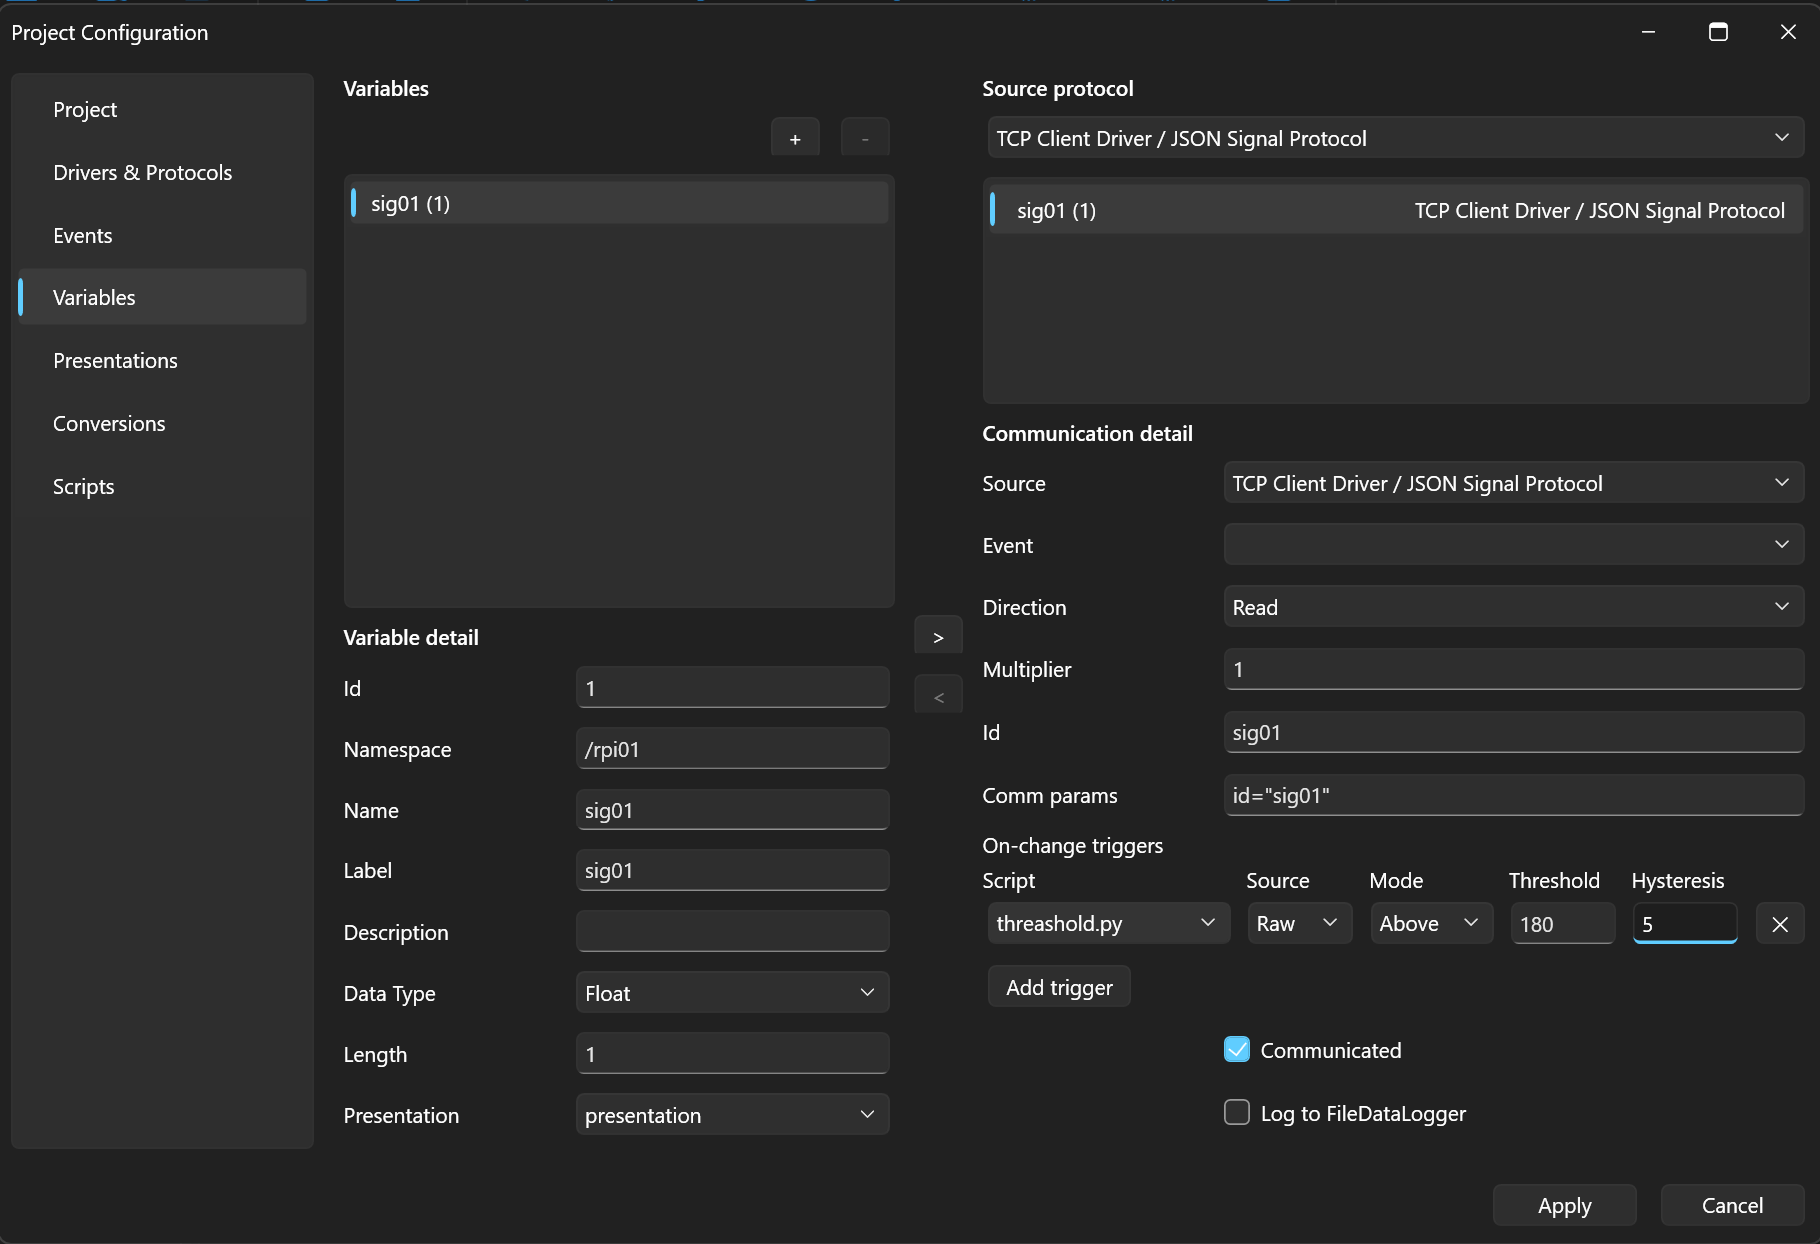
Assigned variables are marked with a blue badge in the Solution Explorer.
Rules
- A variable cannot be deleted while it is assigned to a source — remove it from Communicated first.
- It cannot be removed from Communicated while it is bound to a control on a workspace.
Next
Let's display the variable values — Create a workspace.