

Add a variable
A variable is created in two steps: first it is defined in the project, then it is assigned to a protocol that will feed it with data.
Define the variable
- Open Home → Project Configuration → Variables, keep the type Scalar in the drop-down next to the + button, and click +. (The Matrix type has its own workflow — see the Matrix variable chapter.)
- Fill in the properties: Name (a unique name), Label, optionally Namespace and Description.
- Choose the Data Type and the Presentation (created in the previous chapter). Leave Length at 1 unless the value is an array.
- Confirm with Apply — the value size is derived automatically from the data type.
Bit field (Bit Shift and Bit Mask)
Status words from a device often pack several pieces of information into one word — individual flag bits or multi-bit counters and states. The Bit Shift and Bit Mask fields in the variable detail cut just the desired bits out of the communicated word:
field = (raw >> BitShift) & BitMask
- Bit Shift — the shift applied to the word before masking. Enter
>>2(right),<<3(left), or just a number (positive = right); an empty field = no shift. - Bit Mask — the mask selecting bits after the shift, hexadecimal
(
0x0F) or decimal (15); an empty field or0= no masking.
Example: a two-bit state in bits 7–8 of a UShort word is extracted with
Bit Shift >>7 and Bit Mask 0x03:

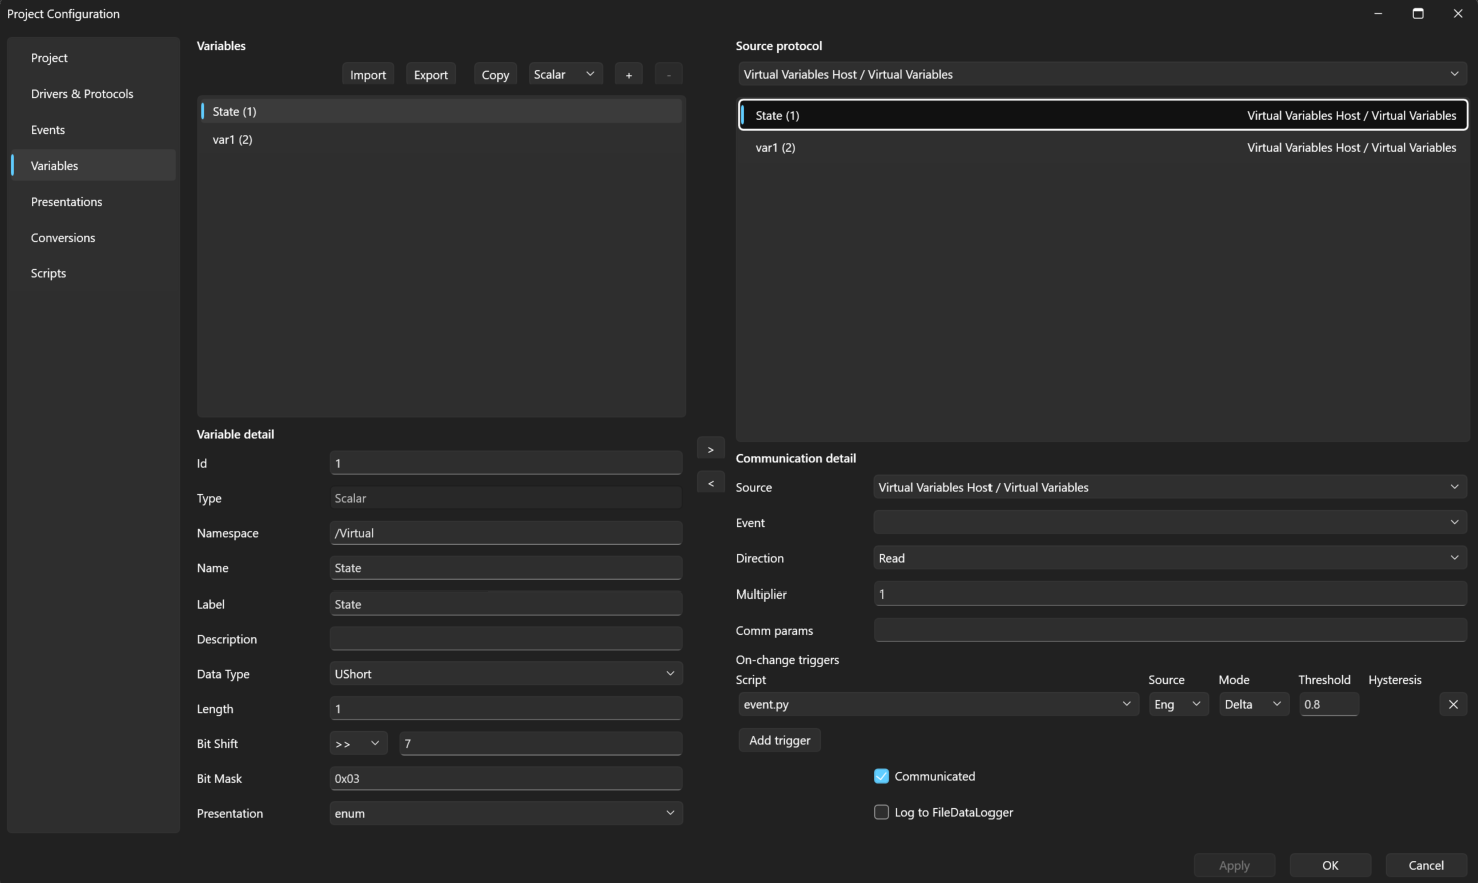
How the bit field behaves:
- The raw value of the variable stays the whole word as it arrived from the communication — whole words are logged and replayed. The bit field is the first step of the raw → engineering computation; the conversion (typically an enum with state names, or a linear one) is applied to the extracted bits.
- Several variables can be bound to the same address with different Shift/Mask — each field of a status word then becomes a separate variable with its own presentation.
- Writing writes only the field's bits: the current word is read, the field's bits are replaced, and the word is written back (read–modify–write); the other bits stay. A value that does not fit into the field is rejected.
- A bit field only makes sense on integer data types; it is ignored for Float/Double/String.
Bit fields are typically used on status words from ECUs: one word from the ECU, several variables with different bit shifts and masks. A complete walkthrough is in the Bit field and a script example.
Assign it to a protocol
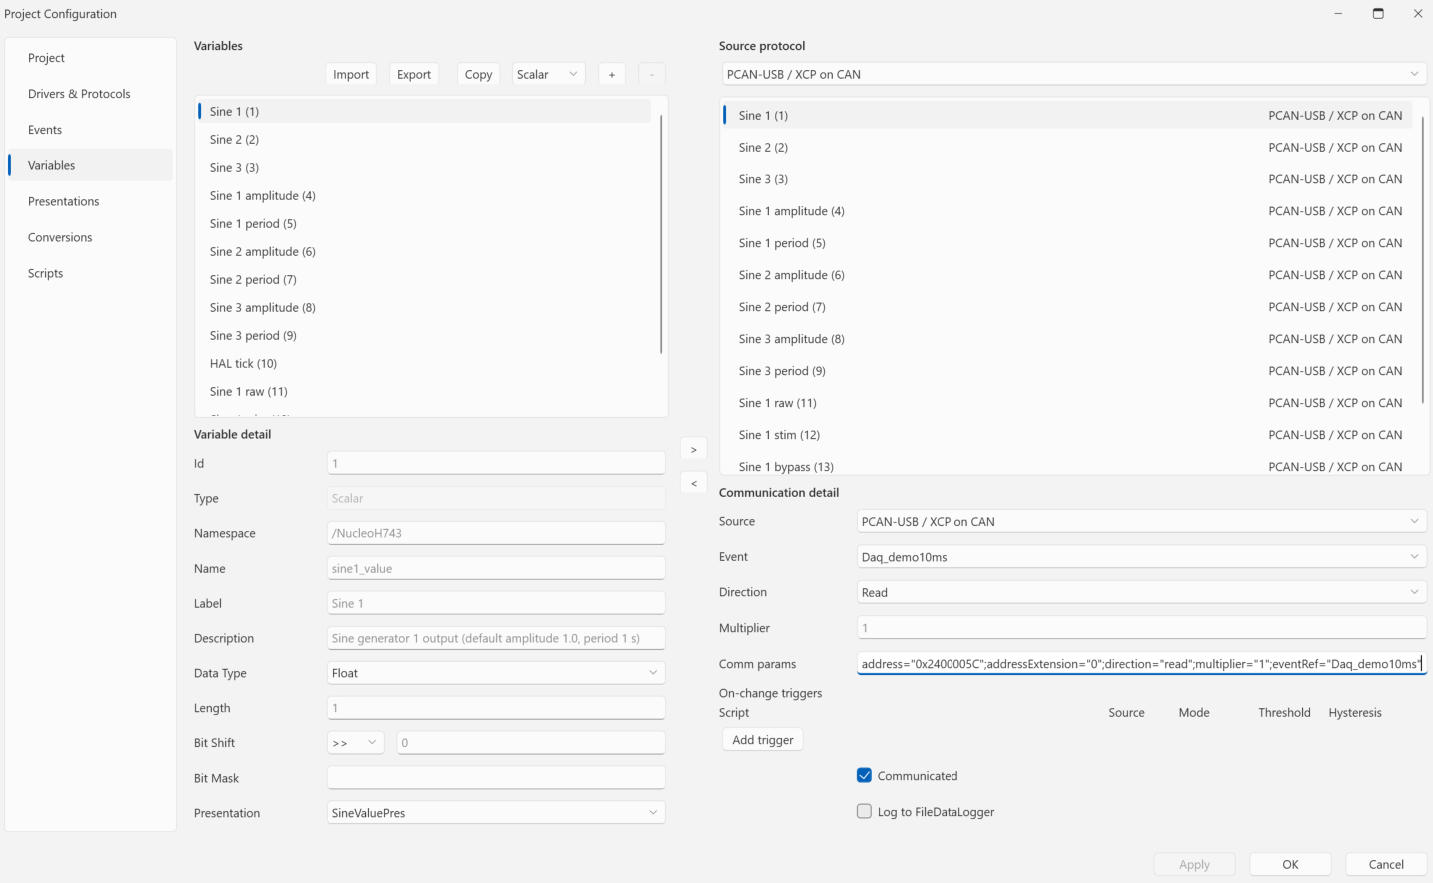
- In the same section, pick the Source on the right — the driver + protocol pair that should feed the variable.
- Move the variable with the arrow button into the Communicated variables of the selected source. (The variable must be applied first.)
- In the communication detail, set:
- Direction — the communication direction (Read, Write, ReadWrite),
- Event — the event deciding when the value is communicated (e.g. a period),
- Comm params — the variable's parameters for the given protocol:
for Raw CAN the CAN ID, offset and byte order; for Modbus the table,
address and direction, e.g.
registerType="holdingRegister";address="100";direction="read";eventRef="poll500ms"; for JSON Signal the signal name (name) (see Protocols for the full parameter reference), - Multiplier — an optional protocol multiplier,
- Log to FileDataLogger — check it if the variable should be logged (see Logging data).
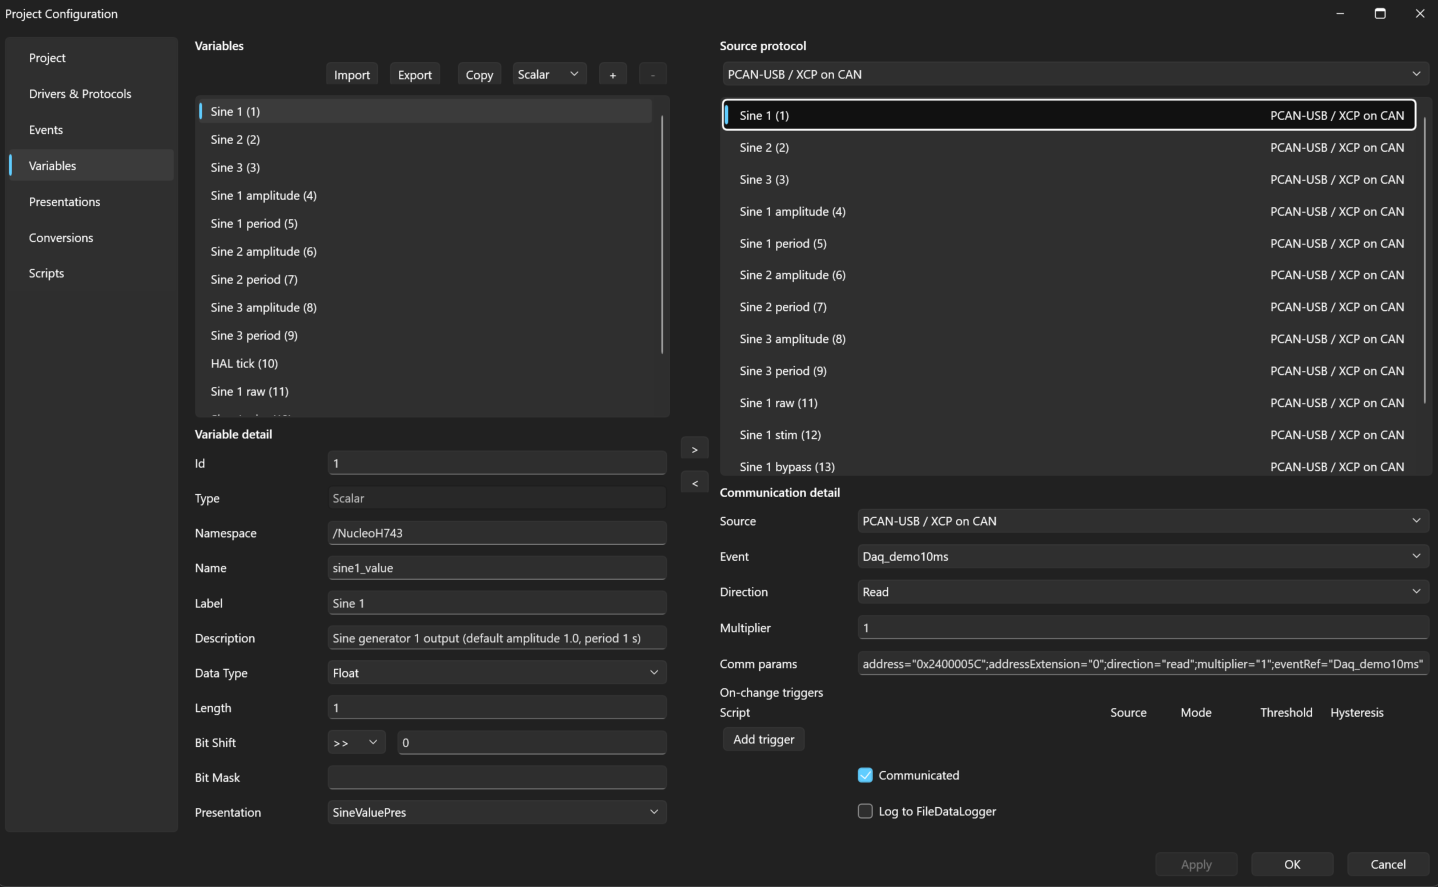
Assigned variables are marked with a blue badge in the Solution Explorer.
Important: A variable without an assigned source (driver + protocol) has nowhere to get its data from and cannot be bound to any control — dropping it on a workspace does nothing. It is easy to recognise in the Solution Explorer: hovering over it shows the tooltip
Source: not foundand the variable's icon lacks the blue badge. This also applies to variables loaded with the Import button (for example from a file produced by the QFW SDK tools) — the import creates definitions only. The fix is the protocol assignment in Project Configuration as described above; for XCP also fill inaddressandaddressExtensionin the Comm params.
Copy, export, and import
The variable list (as well as conversions, presentations, and events) has Copy, Export, and Import buttons:
- Copy — duplicates the selected item under a new name,
- Export — saves all items of the section to an XML file (variables are exported as definitions only, without protocol assignments),
- Import — loads items from an XML file; existing items are never overwritten or renamed.
Rules
- A variable cannot be deleted while it is assigned to a source — remove it from Communicated first.
- It cannot be removed from Communicated while it is bound to a control on a workspace.
Next
Let's display the variable values — Create a workspace.